
The screw handle gets made from a chunk of hard maple. The original looks like oak to me, so make your's from oak if you want. This doesn't get a ton of stress, so maple is fine. The orginal octagonal mortise was cut with a large drill, then pared. I cut mine on my scroll saw (since it was handy) and only had to do a little paring for a sweet fit on the screw's octagonal shaft.

Cut out the handle on the bandsaw, refine the surfaces, then round the arrises. I used a belt sander, and a trim router with a bearing guided roundover bit. The original handle has more of a bullnose profile around the edge, but I was itching to finish this today, so I took the lazy way out.

It doesn't much matter if you fit the handle perfectly, it won't stay perfect unless your shop is the same humidity year round.


Now is a good time to drill and install the 3/8" dowel on the end of the fixed jaw. This allows you to store the jack on its end without it tipping over.

Okay. The base. This is a tricky piece. But I think I've got a decent sequence here to make it relatively painless. I don't think he has a blog post up yet, but Raney Nelson of Daed Toolworks just finished his jack earlier this week, and he opted for a different style base. Check his blog in the near future.

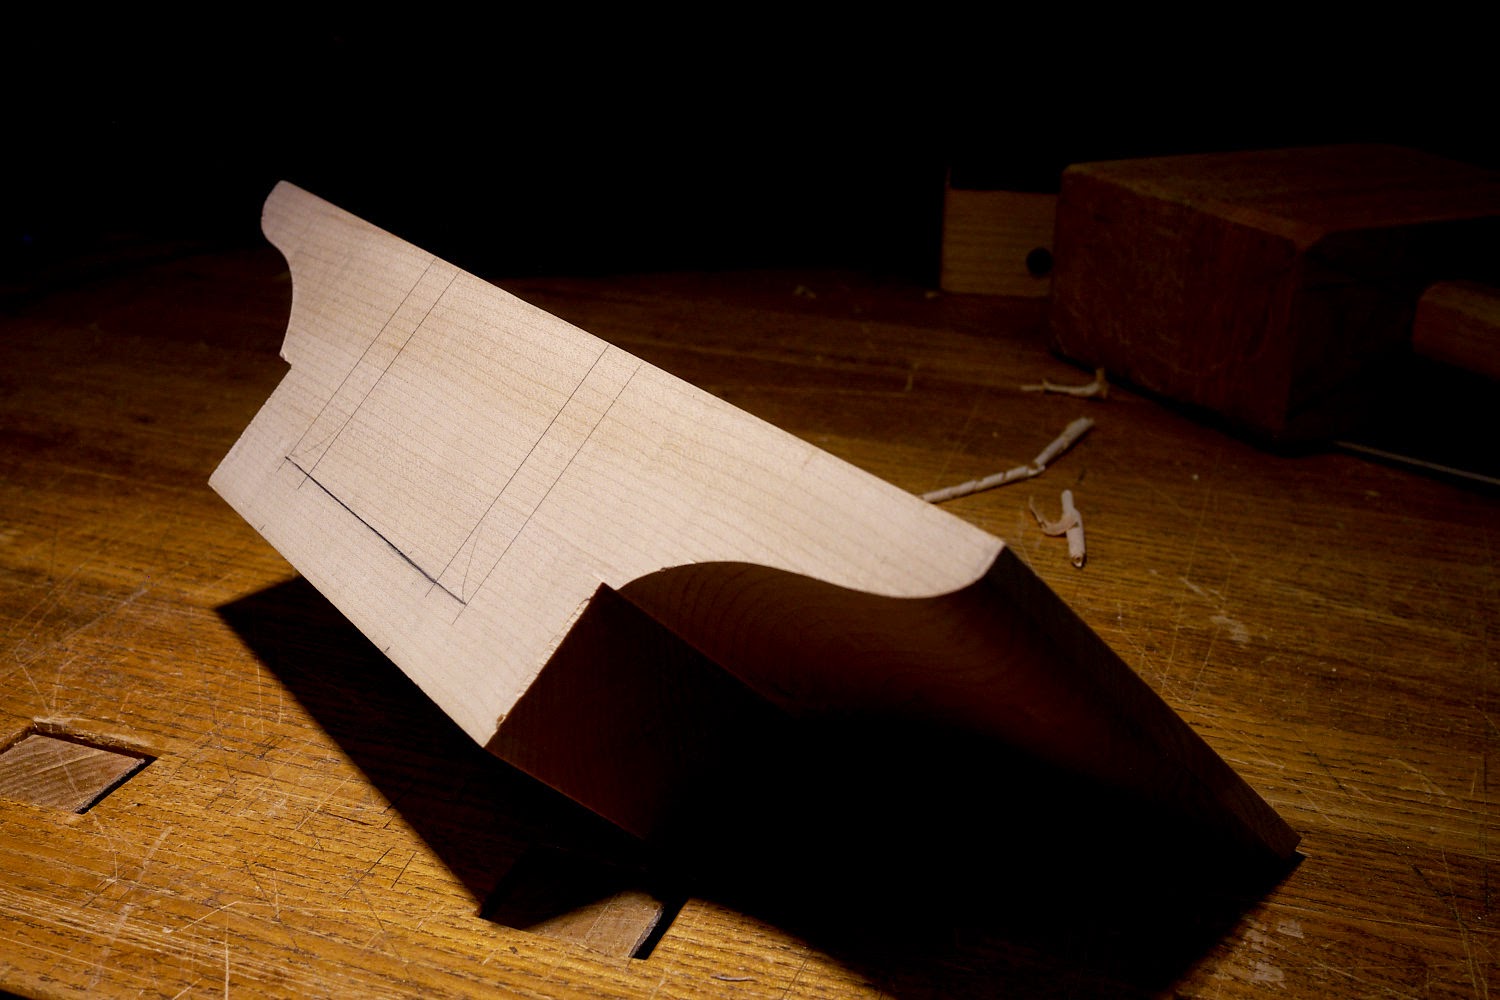
I'm calling this the "square" pocket since it's made while the base is still square. I set up the drill press with a fence and forstner bit to get rid of most the waste.

Then I came in from the other side with the same setup to get rid of even more waste. I overlap my plunges to get as flat a wall as possible.

Cut the blocky waste piece as much as possible with a backsaw.

Then pop out the waste piece with a mallet whack. The little web that remains gets chopped out.


The square pocket is then chopped and pared to the layout lines. The original base was made pretty quickly, so I didn't fuss here trying to get perfect surfaces.

Next, cut the big ogee on the bandsaw. Yes, I still need to change my blade.

Then refine the surfaces. I used a spindle sander, a round plane, scraper, and sandpaper.

With all those steps done, you can cut the miter. A 10" table saw won't be able to do it in one pass. I wouldn't do it that way anyway, for safety reasons.

Saw the rest of the miter off by hand, staying away from the finished surface.


Refine the surface with a long plane. I so love having a row of dogs on my bench. Makes holding stuff like this child's play.

Then I chamfer the edges of the square pocket.
Set the base down on the mitered edge. The angled pocket is now in the perfect position for drilling out the waste, just like in the square pocket.

I set the fence and start drilling right on the arris. If you do this, go slow at first until the bit makes enough of a hole to keep itself jigged in place. I use overlapping holes, and reset the fence once.

Don't drill to full depth unless you don't mind seeing the holes left from the center spur.

If that bothers you, stop short, saw some kerfs at an angle, bang out the waste and pare the pocket to final shape. It's going to be tricky holding onto the base as you chop. Just slog through.


With the pocket pared to shape (again, I didn't waste any time making it pretty, but just chopped as aggressively as I could to get it done quick) round the arrises of the pocket with slicing cuts from a long paring chisel. The original has distinct facets here, so I made mine the same way.


The groove pin can finally be driven into place. I used the same support block as before.

Before screwing the base to the body, I made the little half-moon cutout in the end of the base. This helps you gain access to the hook when engaging the half-miter jaw.


I would recommend you finish your jack with a coat or two of tung oil, BLO, or my favorite Minwax Antique Oil. The runners and moving parts should also get a light of wax to keep them running smoothly.
After the finish on mine dries, I'll do a post on the different ways the jack can be used.
Once again, we still have a few jack kits left if you'd like to build one. Price is $198. Details on our store page.
 Made in the U.S.A.
Beautiful Work J.!!! Only you could make this seem easily accessible to a Joe Blo like me...sigh...but I know better!
ReplyDeleteCheers,
L.