We've been getting some emails about our participation this year at WIA. Due to some family priorities we won't be able to make it to Cincinnati, much to our regret. This is perhaps the most anticipated year for WIA for us since the very first one in Berea, KY five years ago.
Why? First off, Lost Art Press's reprint of Roubo's masterwork will be released at WIA, and a book signing will take place with all (I'm fairly certain) of the collaborators on this project. Read more here. We feel like we're missing an historic event.
Secondly, Peter Galbert. Collaborating with Pete over the past year has been a treat. Releasing our new Drawsharp drawknife sharpening tool (fingers crossed!) at WIA together would have been sweet. Nevertheless, the goal is to get the first ones off the line to the Marketplace and Pete's booth, which I'm told will be manned by Claire and Tim, Pete's fellow toolmaking collaborators.
Thirdly, Peter Ross. After working with Peter on the French Oak Roubo Project this year, we've become huge fans. Not only is Peter's work impeccable, he's an extremely generous person who exudes information freely and with a passion that gets our juices flowing.
In short, if you're on the fence about WIA, you should go this year.
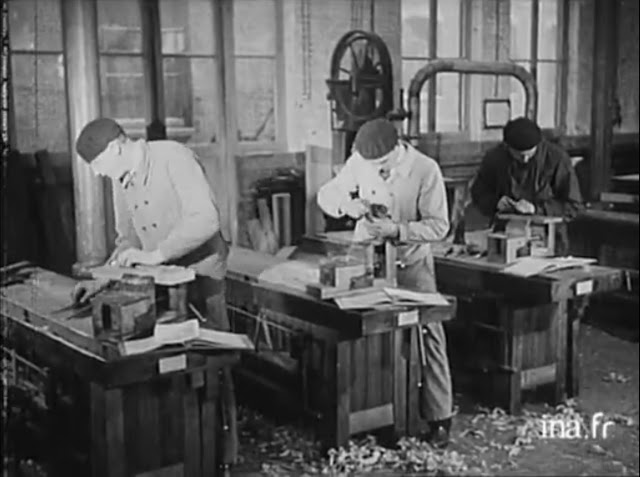
On a somewhat related note, here are a couple old German videos that you should watch.
And since I'm half German, and the great-grandson of a German butcher, here's another interesting watch. It's just another kind of craftsmanship.
Tuesday, September 24, 2013
Friday, September 20, 2013
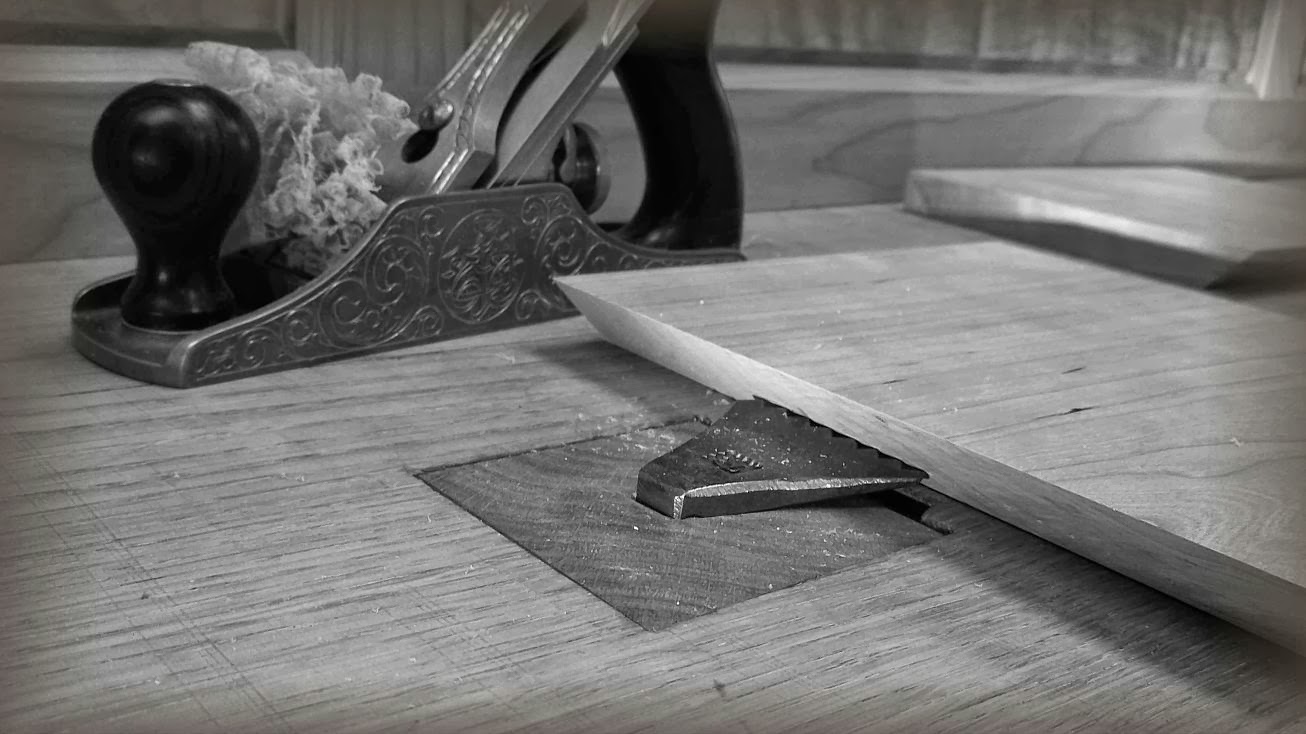
Score One For Roubo's Planing Stop

This week I'm using both Roubo benches to build some large interior trim pieces in cherry. I feel like a true Roubo-style joiner wrangling these 11-foot frame and panels. The Benchcrafted Roubo is pulling its weight processing the individual pieces, while the Plate 11 Roubo is where assembly and trimming is taking place. I feel completely guilty having two incredible benches within a couple steps of each other. It's a feeling I could get used to.
But today the Plate 11 bench solved a workholding problem that made me smile. The toothed planing stop did something that no tail vise and dogs could. I butted a miter into the planing stop and face planed the board. The toothed stop held that board rock solid. Try that with dogs. Pfft.

Wednesday, September 18, 2013
Updates and Custom Mag-Bloks
Bronze, both vises: All Sold Out.

Carvers Vise: 5 remaining

White Oak Mag-Bloks
We have 8x 18" & 8x 12"
Flecking is not as pronounced in all of them. Luck of the draw.
Shoot us an email and we'll invoice you. Price is the same as our Standard bloks.

Tuesday, September 17, 2013
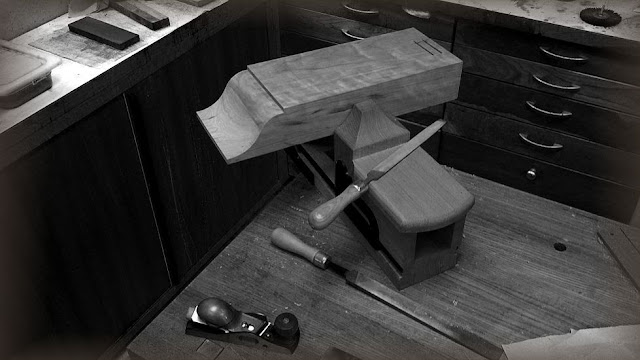
French Chops
Using my Benchcrafted Carver's Vise today to clean up some very large cyma recta ogees. Having clear access all around, and chest-height positioning makes for very enjoyable detail work.


Monday, September 16, 2013
Laser Beams

I've been gearing up to make some chairs for our dining room table for a number of years now. At my current pace, I figure I might get them done by the time I'm 50. It's been three years since I built the table. Wow, I better get busy.
To that end I recently built a couple mounts for my laser levels. I first heard about using these levels from Peter Galbert, who in turn got the idea from fellow chair maker Greg Pennington. Greg came up with the idea a couple years ago and has been using the technique for teaching and building.
While Greg's mounts get the job done, I had a day off last week and thought I'd try and get clever with my own design (watch it kid, don't get cocky.) A couple chunky offcuts from a bench build earlier this year looked they'd work.
I added a protractor scale to the body for quick setting. When using Galbert's sightline square to determine the drilling angle (or resultant angle) the scale will come in handy for setting the laser to that angle without having to adjust a bevel square, then match the laser to that. At least that's the theory. We'll see if it pans out. Most chairmaking angles are 30 degrees or less, but my mounts go all the way to 45 in either direction. Kind of like the amp from Spinal Tap. I also glued some suede to the bottom of my mounts to keep them from sliding around.
To read more about how these laser levels work for chairmaking, visit Greg's blog here. And Pete's blog here.
I bought my lasers from Amazon. Don't be swayed by the bad reviews. They are decent tools for the money, and work very well for this application. Most of the negative comments are about mounting the laser to walls, which it doesn't do well at all. I also covered up all the gaudy competition-orange plastic housing with a sharpie.


Wednesday, September 11, 2013
In The Works At Benchcrafted

This has been an enormously busy year here at Benchcrafted. The Carver's Vise, Handworks, and the French Oak Roubo Project ate up huge swaths of time. But during many late nights and early mornings over the past 10 months we've been plugging away on a couple new things that we're making.
In our research for the French Oak Roubo project we noticed that virtually all extant French benches (Plate 11 style) utilize metal bench screws for the leg vise hardware. Now, we haven't found benches that are much older than the mid 1800's, but a surprising number of these, around 90% of the one's we've seen, use all-metal hardware, much like the hardware used on the La Forge Royale carver's chops, and our reproduction, the Benchcrafted Carver's Vise.

With some help from Brian Anderson, (thanks to Lost Art Press for the introduction) we've discovered some interesting features of this seemingly simple mechanism. Namely, how does one install the vise? Many of the extant examples feature a large washer that fits between the handle (the hub to be specific) and a square bearing plate that gets screwed to the chop. The problem is, the round washer covers the mounting screws.


Yet other benches, which show no evidence of a square plate at all, show the round washer without fasteners. The answer is this: none of these parts is a garter. The screw and hub are not tied to the washers and plate, they simply bear against it in use. When opening these vises, the chop must be pulled back manually.
As an American woodworker, I'm used to my vise opening when I loosen the screw. I like this feature, especially when I have a workpiece in my other hand.
Although it doesn't happen often, we do get requests for vises with a more traditional, classic look. Even though handwheels on vises are not modern, our particular design has a bit of a modern flair that not everyone is into. Plus, we're vise enthusiasts here, and if we get the bug to make something, we're going to try our best to make it happen so other vise nuts can share in the joy.
That's the case with our new leg vise hardware. It will be made entirely from steel, will feature a round flange with two attachment screws, and no square plate. We'll be machining the flange and hub with a precisely matched concave/convex radius to spread clamping pressure and ensure smooth action when holding work.

The vise's screw will feature a unique thread that's all but disappeared from modern vises: the double-lead acme screw. Common in the 19th century and early part of the 20th century (H.O. Studley's handwheel-equipped vises use double-lead screws), this screw geometry fell out of favor, possibly due to the demanding nature of tapping the nuts, which requires lots of steel removal in a relatively short distance. This vise will move at 1/2" per revolution, or 2 tpi, the same as traditional wood screws. The screws, like all our screws, will be roll-formed, which leaves a smooth, polished finish. You won't need to slather the screw with oil or grease for it to work smoothly.
We're also incorporating a unique feature into the handle and hub which will allow quick and effortless gross adjustments.
We'll likely be finishing the show parts (the hub, flange and handle) with a new treatment that will give a satiny gray-black look to the parts, reminiscent of a hand-forged finish, but without the film look of paint or powder coat.
Paired with our Crisscross, this vise will be a very functional and classy leg vise for traditional benches.
Below is a mock-up of the new leg vise. We expect this to be available in time for Christmas. Pricing is still a bit up in the air, but we can say with confidence it will be more accessible than a Glide Crisscross.

 |
| Pete Galbert honing away with a Drawsharp prototype. Photo by Greg Pennington |
The other item we've been burning the midnight oil on is something that is a bit unusual for us. Several months ago we we're approached by chairmaker Peter Galbert about producing a tool for sharpening drawknives. We've been approached before about making tools which don't exactly fall into the workholding category, and we've been pretty strict about sticking to what we know here. But when a world-class chairmaker pitches an idea, you tend to sit up in your chair and listen.
The Galbert Drawsharp is a honing jig that makes sharpening most any drawknife a quick, easy and repeatable task. Peter maintains a rigorous teaching schedule, and inevitably a huge portion of those classes is eaten up by prepping students' drawknives, many of which come straight from the flea market or used tool dealers. Needless to say, many of the edges need serious attention. The Drawsharp was born out of a need to get knives up to a sweet polish in just a few minutes, leaving more time for students to get to work with their knives. In many cases, the Drawsharp can eliminate the need for tedious grinding, which takes an experienced hand, or at minimum a separate grinding setup.

When I first starting messing around with drawknives several years ago, sharpening was always a chore, especially since I was coming from a mostly flat-work background, where I could get dead sharp edges on plane irons, and produce a glassy surface with ease. My drawknife sharpening skills weren't up to snuff, and I didn't have a burning desire to improve them. That all changed when Pete sent me a Drawsharp prototype several months ago. After an evening in the shop with an old Witherby and the prototype, I knew this was something we were going to produce. After countless emails, Skype chats, and phone calls, we finalized the design earlier this spring (discovering a couple big improvements along the way) and expect the first run of Drawsharps to be available sometime next month. Pete is teaching at Woodworking In America this year, and if all goes as planned, he'll have Drawsharps for sale in his booth in the Marketplace.
Later this fall, we'll have a video tutorial with Pete on how to use the Drawsharp to get a ridiculous polish on any drawknife. Stay tuned to the blog for updates.

Subscribe to:
Posts (Atom)
 Made in the U.S.A.